Setting up Email
Email အသုံးပြုနိုင်တဲ့နည်း (၃) နည်းရှိပါတယ်။
- Google Workspace
- Webmail
- Desktop Mail Client
- Mobile Mail Client
Google Workspace ဝန်ဆောင်မှုရယူထားတဲ့ အီးမေးလ်စနစ်တွေပဲ Google Login ရပါတယ်။ အီးမေးလ်လိပ်စာတစ်ခုပဲ အဖွဲ့အစည်းလိပ်စာနဲ့ဖြစ်ပြီး ကျန်တဲ့အသုံးပြုပုံအားလုံးက Gmail နဲ့တူတူပဲဖြစ်ပါတယ်။ Google Workspace ရှိရင် Google Workspace အပိုင်းကိုဖတ်ပါ
Google Workspace မရှိရင် Web Mail ၊ Desktop Mail Clients ၊ Mobile Mail Clients အပိုင်းတွေကိုဖတ်ပါ။
Google Workspace နဲ့ Webmail က အီးမေးကိုအင်တာနက်ဘရောက်ဇာကနေ တိုက်ရိုက်ဝင်ကြည့်တာဖြစ်ပါတယ်။ မေးလ်ဆာဗာပေါ်မှာသိမ်းထားတဲ့ အီးမေးလ်တွေကို အင်တာနက်ရတဲ့အချိန်မှာ ဖတ်ခြင်း၊ ပို့ခြင်းပြုလုပ်နိုင်ပြီး အသုံးပြုနေတဲ့ကွန်ပြူတာ (သို့) မိုဘိုင်းစက်ပစ္စည်းထဲမှာ သိမ်းဆည်းထားခြင်းမရှိပါဘူး။ အင်တာနက်နဲ့ ဘရောက်ဇာရှိတာနဲ့ ဝင်သုံးလို့ရတာမို့လို့ ကွန်ပြူတာဖြစ်ဖြစ်၊ ဖုန်း/တက်ဘလက်မှာပဲဖြစ်ဖြစ် အသုံးပြုပုံချင်းအတူတူဖြစ်ပါတယ်။ အားနည်းချက်ကတော့ အင်တာနက်မရရင် အသုံးမပြုနိုင်တော့ဘဲ လက်ခံလည်းမကျန်ခဲ့တာကြောင့် အင်တာနက်မရတဲ့အချိန် အရင်ကအီးမေးလ်တွေပြန်ကြည့်လို့မရနိုင်ပါဘူး။ အီးမေးလ်အသစ်ဝင်လာတဲ့အခါမှာလည်း notification တက်မှာမဟုတ်ပါဘူး။
Desktop နဲ့ Mobile mail client တွေကတော့ ကွန်ပြူတာ (သို့) ဖုန်း/တက်ဘလက်မှာထည့်သွင်းထားတဲ့ အီးမေးလ်အပလီကေးရှင်းကတဆင့် ဆာဗာကိုချိတ်ဆက်တာဖြစ်ပါတယ်။ ကနဦးစတင်ချိတ်ဆက်တဲ့အခါမှာ လုပ်ဆောင်ရတဲ့အဆင့်တွေပိုများပေမယ့် နောက်ပိုင်းမှာတော့ Webmail ထက်အသုံးပြုရတာပိုလွယ်ကူပါတယ်။ အီးမေးလ်အသစ်ဝင်လာရင်လည်း notification ကနေသိနိုင်ပါတယ်။ အင်တာနက်ရနေတုန်းမှာ ဆာဗာပေါ်ကအီးမေးလ်တွေကို ကွန်ပြူတာ၊ ဖုန်း/တက်ဘလက်ထဲကို download လုပ်ထားတာမို့လို့ အင်တာနက်မရတော့တဲ့အခါမှာလည်း ယခင်ရှိပြီးသား အီးမေးလ်တွေကိုဆက်လက်ကြည့်ရှုနိုင်မှာဖြစ်ပါတယ်။
Google Workspace
Chrome browser ဖွင့်ပါ
ညာဘက်အပေါ်ထောင့်နားက မိမိ user icon ကိုနှိပ်ပါ
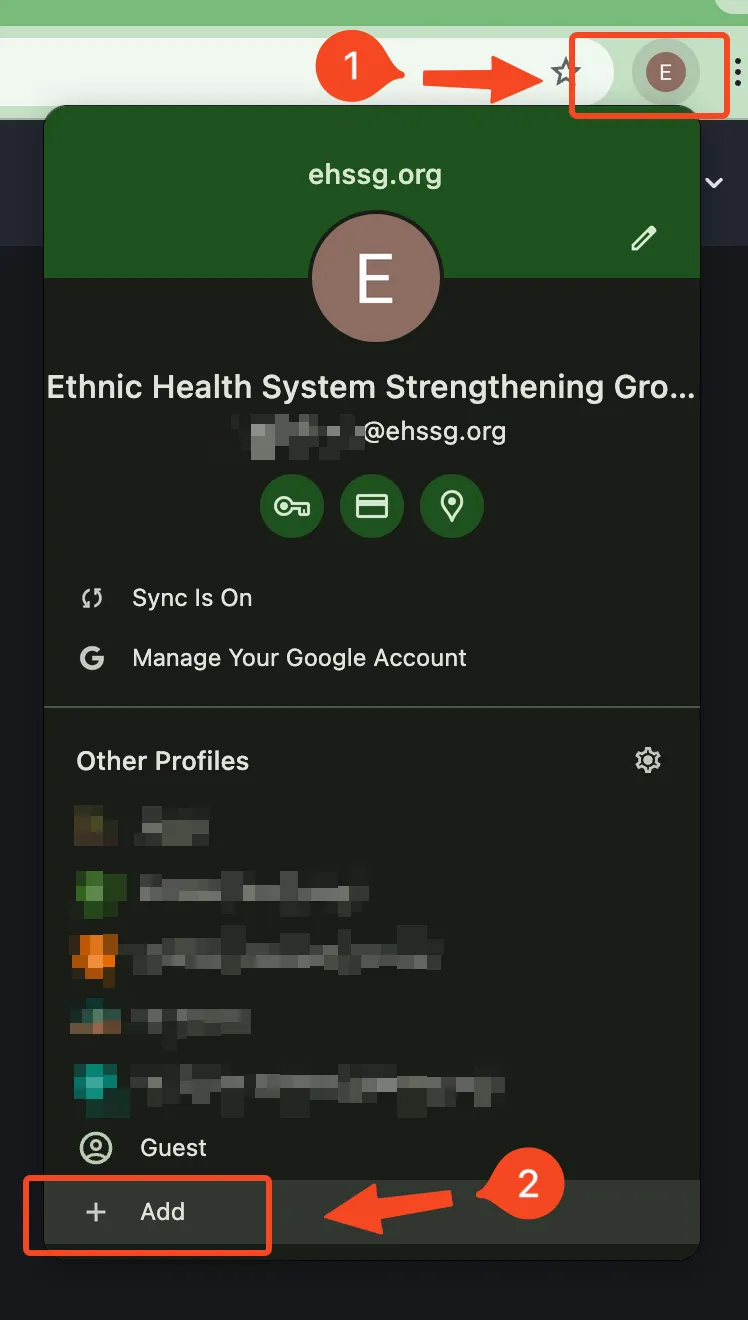
အောက်ဆုံးရှိ Add ကိုနှိပ်ပါ
Sign in ကိုနှိပ်ပါ
မိမိအီးမေးလ်နှင့် password ကိုထည့်သွင်းပါ
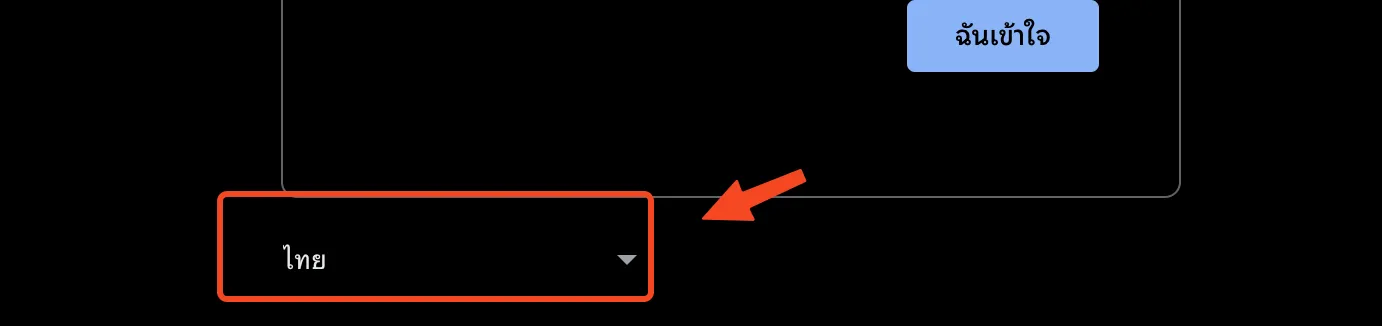
Sign in လုပ်လိုက်လျှင် Welcome to your new account ပေါ်လာလျှင် I understand ကိုနှိပ်ပါ
အသုံးပြုသည့်အင်တာနက်ဝန်ဆောင်မှုပေါ်မူတည်၍ ဘာသာစကားကွာခြားချက်ရှိနိုင်ပါသည်၊ အင်္ဂလိပ်ဘာသာစကားမဟုတ်ပါက အောက်ဆုံးသို့ဆွဲချ၍ ဘာသာစကားပြောင်းလဲနိုင်ပါတယ်
Create a strong password စာမျက်နှာမှာ password အသစ်ပေးရပါမယ်၊ Create Password နဲ့ Confirm မှာ password အသစ်ကိုတူညီအောင်ထည့်သွင်းပါ
Welcome to your new profile ပေါ်လာလျှင် Next နှိပ်ပါ
Turn on sync စာမျက်နှာတွင် Yes I’m in ကိုနှိပ်ပါ
Customize your chrome profile စာမျက်နှာမှာ မိမိအီးမေးလိပ်စာအတိုင်းထည့်သွင်းပါ၊ Done နှိပ်ပါ
အားလုံးပြီးသွားတဲ့အခါမှာ Chrome profile အသစ်ပွင့်လာမှာဖြစ်ပါတယ်၊ ယခုနည်းအတိုင်းပြုလုပ်ခြင်းအားဖြင့် နဂိုရှိပြီးသား Gmail account နဲ့ လုပ်ငန်းသုံး account တို့ရောထွေးခြင်းမရှိဘဲ သီးခြားစီသုံးနိုင်မှာဖြစ်ပါတယ်
Web Mail
Google Workspace ဝန်ဆောင်မှုမယူထားတဲ့ webmail ကိုချိတ်ဆက်အသုံးပြုနည်းဖြစ်ပါတယ်။ အီးမေးလ်ဒိုမိန်းရဲ့နောက်မှာ port နံပါတ် 2096 ကို ကော်လံခံပြီး ဘရောက်ဇာလိပ်စာမှာထည့်လိုက်ရုံနဲ့ web mail မှာလွယ်လွယ်ကူကူအီးမေးလ်သုံးနိုင်မှာဖြစ်ပါတယ်။ ဥပမာအီးမေးလ်ဒိုမိန်းက ehssg.org ဆိုရင် ehssg.org:2096 လို့ထည့်ရမှာဖြစ်ပါတယ်။
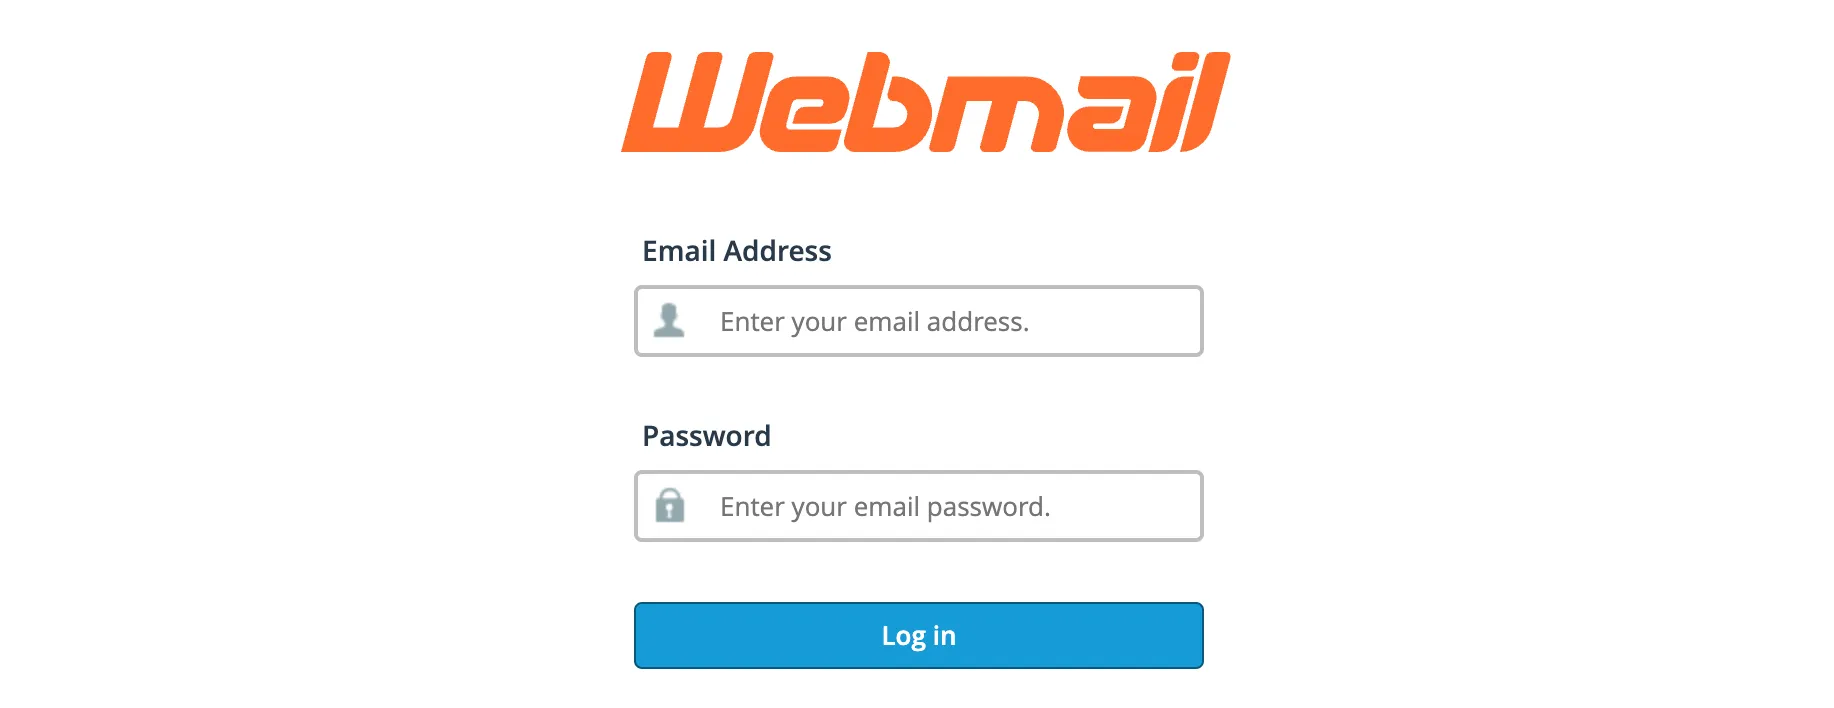 Webmail login ဝင်ရမယ့်စာမျက်နှာမှာ email နဲ့ password ထည့်သွင်းပြီး login ဝင်လိုက်တာနဲ့ Webmail မူလစာမျက်နှာကိုရောက်ပါမယ်။
Go to Inbox
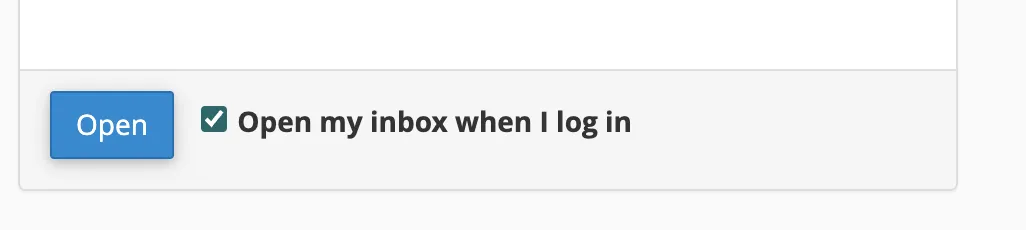
Webmail Home မှာ roundcube webmail logo ပုံအောက်က Open ခလုတ်ကိုနှိပ်ပြီး Inbox ကိုဝင်နိုင်ပါတယ်။ Open ခလုတ်ရဲ့ဘေးမှာ Open my inbox when I log in ကိုအမှန်ခြစ်ပေးခဲ့မယ်ဆိုရင် နောက်ပိုင်း login ဝင်တိုင်းမှာ Inbox ထဲကိုတန်းရောက်မှာဖြစ်ပါတယ်။
Autoresponders/ Vacation responders
ခွင့်ရက်ရှည်ယူတဲ့အခါမျိုးမှာ ကိုယ့်ဆီအီးမေးလ်ဝင်ရင် အလိုအလျောက်စာပြန်ပေးတာမျိုး တွေ့ဖူးကြမှာပါ။ အများဆက်သွယ်နိုင်ဖို့ဖွင့်ထားတဲ့ info@example.com ၊ hr@example.com တို့လိုအီးမေးလ်တွေ၊ တိုင်စာလက်ခံမယ့် psea@example.com တွေလိုမျိုးမှာ သူများအီးမေးလ်ပို့လာရင် လက်ခံရရှိကြောင်း အလိုအလျောက်စာပြန်ပေးတာမျိုး ထည့်ထားသင့်ပါတယ်။
Autoresponders ခလုတ်ကိုနှိပ်ပါ

Add Autoresponder ခလုတ်ကိုနှိပ်ပါ

Character Set မှာ utf-8 ပဲထားပါ
Interval ကို 0 ထက်ကြီးတဲ့ဂဏန်းတခုခုပေးပါ။ 0 ပေးလိုက်ရင် လိပ်စာတစ်ခုတည်းကနေ အီးမေးလ်တစ်စောင်ပို့တိုင်း အမြဲစာပြန်နေပါလိမ့်မယ်။ 2 ထားမယ်ဆိုရင် လိပ်စာတစ်ခုတည်းကနေ အီးမေးလ်တွေတောက်လျှောက်လှမ်းပို့နေတဲ့အခါ နှစ်နာရီကြာမှတစ်ကြိမ်သာ အလိုအလျောက်စာပြန်ပါလိမ့်မယ်။ အီးမေးလ်တွေဗုံးကျဲသလိုဆက်တိုက်ပို့တဲ့ ပရိုဂရမ်တစ်ခုကနေသာ စက္ကန့်နဲ့အမျှအီးမေးလ်ပို့ခံနေရရင် ကိုယ့်ဆီကနေလည်း စက္ကန့်နဲ့အမျှစာပြန်နေပါလိမ့်မယ်။ အဲလိုနည်းနဲ့ မေးလ်ဆာဗာကျသွားတတ်ပါတယ်။
From မှာကိုယ်ပေါ်စေချင်တဲ့နာမည်တစ်ခုထည့်လို့ရပါတယ်။ ကိုယ့်နာမည်ကိုယ်ထည့်လည်းရပါတယ်။
Subject မှာ ပြန်စာရဲ့ subject ကိုထည့်ပါ
Body မှာ ပြန်စာရဲ့စာကိုယ်ထည့်ပါ။ This message contains HTML ကိုအမှန်ခြစ်စရာမလိုပါဘူး။ တချို့ <html></html> ကုဒ်တွေထည့်ရေးမယ်ဆိုမှ အမှန်ခြစ်စရာလိုတာပါ။
Start မှာ စတင်အသက်ဝင်ချင်တဲ့ရက်စွဲနဲ့အချိန်ကိုရွေးပါ
Stop မှာ ရပ်ချင်တဲ့ရက်စွဲနဲ့အချိန်ကိုရွေးပါ။ ခွင့်ယူထားရာကနေ လုပ်ငန်းခွင်ပြန်ဝင်နိုင်မယ့်အချိန်ကိုပေးထားလို့ရပါတယ်။ ပြီးရင် Create ခလုတ်နှိပ်ပြီးသိမ်းထားလို့ရပါပြီ
Deleting Autoresponders
Autoresponder လုပ်ထားပြီးသားကို ပြန်ဖျက်မယ်ဆိုရင် Autoresponder စာမျက်နှာမှာ သက်ဆိုင်ရာပြန်စာရဲ့ညာဘက်အစွန်က Delete ခလုတ်ကိုနှိပ်ပြီးဖျက်လို့ရပါတယ်။
Change Email Password
Email login password ပြောင်းဖို့အတွက် Webmail ကနေအရင်ဝင်ရပါမယ်။ Webmail Login အပိုင်းကိုပြန်ဖတ်ရန်
Webmail Home စာမျက်နှာမှာ Password & Security ကိုနှိပ်ပါ။

New Password မှာ Password အသစ်ကိုထည့်ပါ။
Confirm New Password မှာနောက်တစ်ခေါက်ထပ်ထည့်ပေးပါ၊ New Password နဲ့ Confirm New Password တူရပါမယ်။
Password Rule
Password တစ်ခုမှာ စာလုံးရေအနည်းဆုံး (၅) လုံးရှိရပါမယ်။ Password Strength မှာလည်း အနည်းဆုံး (၆၅) ရှိရပါမယ်။ Password စည်းမျဉ်းနဲ့ကိုက်ညီအောင်ပေးဖို့ အခက်အခဲရှိရင် Password Generator ကိုနှိပ်ပြီးသင့်တော်ရာပေးလို့ရပါတယ်။ Password Generator ကနေရယူထားတဲ့ password ကိုတော့ လုံခြုံစိတ်ချရတဲ့တစ်နေရာမှာ မှတ်သားထားဖို့လိုပါတယ်။ နောက်ပိုင်း Email client တွေနဲ့ချိတ်ဆက်တဲ့အခါမှာ အဲဒီ password ကိုပြန်ထည့်သွင်းဖို့လိုတဲ့အတွက်ကြောင့်ပါ။
Desktop Mail Clients
Thunderbird for Windows
Windows အတွက် Thunderbird Download ရယူရန်။ Download စာမျက်နှာ Operating System မှာ Windows ကိုရွေးပါ။ Download ခလုတ်ကိုနှိပ်ပါ။
Download ပြီးလို့ရလာတဲ့ installer ကိုဖွင့်ပါ။ Next ခလုတ်နှိပ်ပါ။
Setup Type မှာ Standard ကိုရွေးပါ။
Use Thunderbird as my default mail application ကိုအမှန်ခြစ်ပါ။ Install ခလုတ်နှိပ်ပါ
ပြီးသွားရင် Finish ခလုတ်နှိပ်ပါ
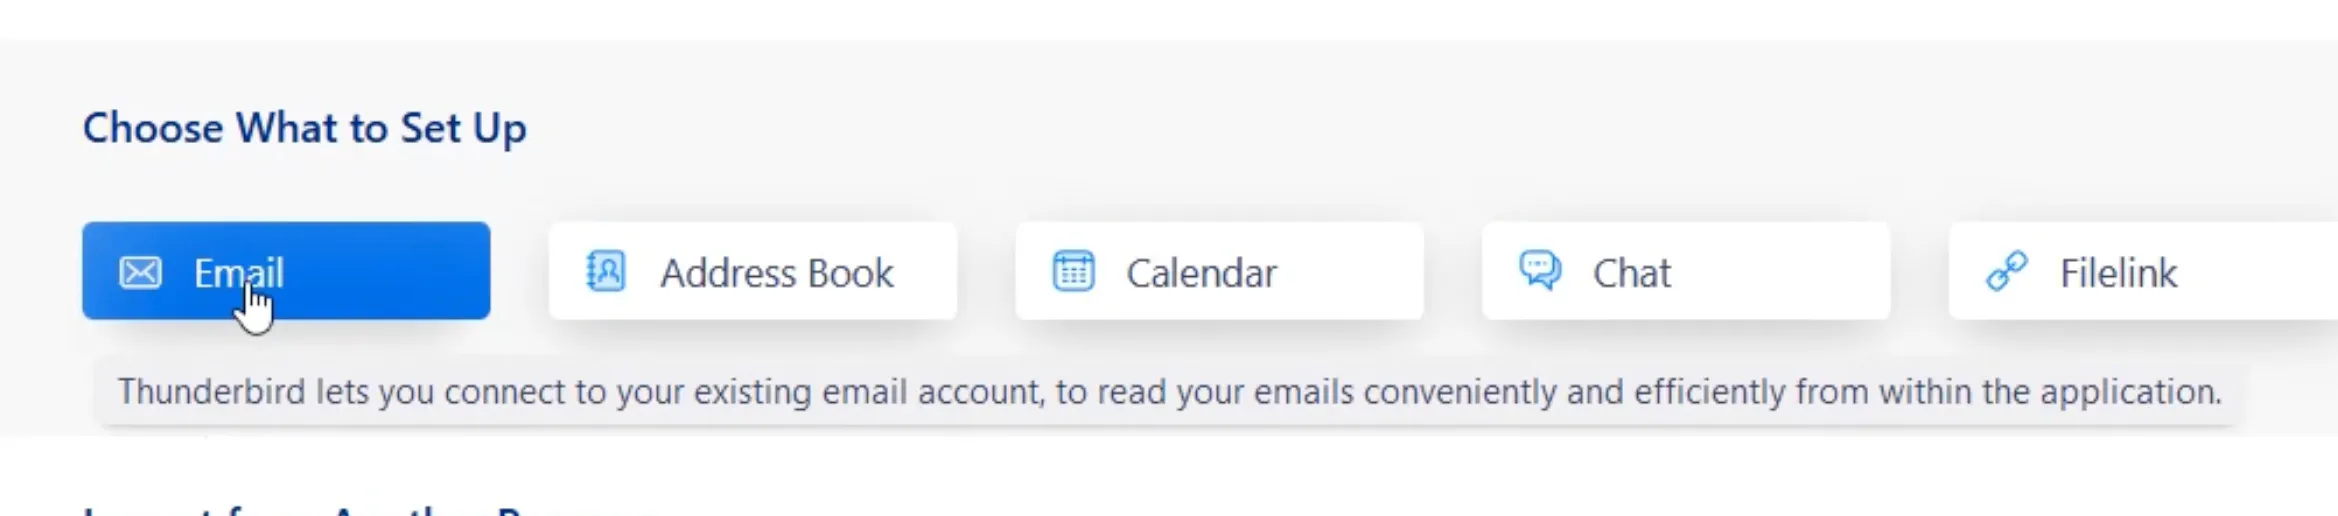
Thunderbird ပွင့်လာရင် Choose What to Set Up အောက်မှာ Email ကိုနှိပ်ပါ
 Full Name မှာ ကိုယ့်နာမည်ထည့်ပါ
Email address ထည့်ပါ
Password ထည့်ပါ။ Password မမှတ်မိတော့ရင် (သို့) Password ပြောင်းချင်တယ်ဆိုရင် Webmail မှာသွားပြောင်းလို့ရပါတယ်
ပြီးရင် Configure manually နှိပ်ပါ။ အောက်ပါအချက်အလက်တွေအတိုင်းထည့်သွင်းပါ
| Incoming Server | Value |
|---|---|
| Protocol | IMAP |
| Hostname | mail.example.com |
| Port | 993 |
| Username | user@example.com |
| Outgoing Server | Value |
|---|---|
| Hostname | mail.example.com |
| Port | 465 |
| Username | user@example.com |
Retest ခလုတ်ကိုနှိပ်ပါ။ The following settings were found by probing the given server လို့ပေါ်လာရင်ချိတ်ဆက်မှုအောင်မြင်ပါတယ်။
Done ခလုတ်ကိုနှိပ်ပါ။ အားလုံးမှန်ကန်လို့ ဆာဗာနဲ့ချိတ်ဆက်နိုင်ပြီဆိုရင် Account Successfully Created စာမျက်နှာကိုရောက်ပါမယ်။ Finish ခလုတ်ကိုနှိပ်ပါ။
New Message ခလုတ်ကိုနှိပ်ပြီး အီးမေးလ်ပို့လို့ရပါပြီ
Microsoft Outlook for Windows
Microsoft Outlook အပလီကေးရှင်းကိုဖွင့်ပါ။ File ထဲက Info မှာ Add Account ခလုတ််ကိုနှိပ်ပါ။

Email address ထည့်ပါ
Advanced Setup မှာ IMAP ရွေးပါ
IMAP ကိုရွေးရတဲ့အကြောင်းရင်းနဲ့ IMAP နဲ့ POP ကွာခြားချက်ကိုဖတ်ရန်
အောက်ပါအချက်အလက်တွေအတိုင်းထည့်သွင်းပါ
| Incoming Mail | Value |
|---|---|
| Server | mail.example.com |
| Port | 993 |
| Encryption method | SSL/TLS |
| Outgoing Server | Value |
|---|---|
| Server | mail.example.com |
| Port | 465 |
| Encryption method | SSL/TLS |
ပြီးရင် Next ခလုတ်နှိပ်ပါ။
Password ထည့်သွင်းပါ။
Password မမှတ်မိတော့ရင် (သို့) Password ပြောင်းချင်တယ်ဆိုရင် Webmail မှာသွားပြောင်းလို့ရပါတယ်
Connect ခလုတ်ကိုနှိပ်ပါ
အချက်အလက်တွေမှန်တယ်ဆိုရင် Account successfully add လို့ပြပါမယ်။ Done ကိုနှိပ်ပါ။
Windows Mail
Windows 10/11 မှာပါလာပြီးသားဖြစ်တဲ့ Windows Mail အပလီကေးရှင်းကို Start Menu မှာ Mail လို့ရိုက်ထည့်ပြီးရှာဖွင့်လို့ရပါတယ်။
Mail window ဘယ်ဘက်အောက်ထောင့်မှာ Setting ခလုတ်ကိုနှိပ်ပါ။

Manage Accounts ကိုနှိပ်ပါ
Add account ကိုထပ်နှိပ်ပါ
အောက်ဆုံးက Advanced setup ကိုနှိပ်ပါ
Internet email ကိုရွေးပါ
အောက်ပါအချက်အလက်တွေအတိုင်းထည့်သွင်းပါ
| Email address | user@example.com |
|---|---|
| User name | user@example.com |
| Password | password |
| Account name | Your Name |
| Send your messages using this name | Your Name |
| Incoming email server | mail.example.com |
| Account type | IMAP4 |
| Outgoing (SMTP) email server | mail.example.com |
ပြီးရင် Next ခလုတ်နှိပ်ပါ။
Password ထည့်သွင်းပါ။
Password မမှတ်မိတော့ရင် (သို့) Password ပြောင်းချင်တယ်ဆိုရင် Webmail မှာသွားပြောင်းလို့ရပါတယ်
Connect ခလုတ်ကိုနှိပ်ပါ
အချက်အလက်တွေမှန်တယ်ဆိုရင် Account successfully add လို့ပြပါမယ်။ Done ကိုနှိပ်ပါ။
Thunderbird for Mac
Mac အတွက် Thunderbird Download ရယူရန်။ Download စာမျက်နှာ Operating System မှာ MacOS ကိုရွေးပါ။ Download ခလုတ်ကိုနှိပ်ပါ။
Download ပြီးလို့ရလာတဲ့ installer ကိုဖွင့်ပါ။ ဖိုင်ကိုဖွင့်လိုက်တာနဲ့ Thunderbird disk ကို mount လုပ်မှာဖြစ်ပြီး Thunderbird ကိုကလစ်ဖိဆွဲလာပြီး ညာဘက်က Application folder ပေါ်ရောက်ရင်လွှတ်ချပါ
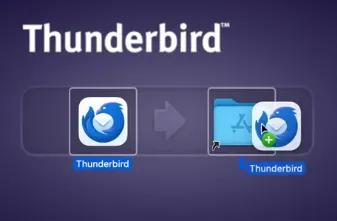
Application list မှာ Thunderbird ကိုရှာဖွင့်လို့ရပါပြီ။ Thunderbird is an app downloded from the internet. Are you sure you want to open it? ပေါ်လာရင် Open နှိပ်ပါ။
Thunderbird ဖွင့်လိုက်တာနဲ့ Set up an Existing Email Account ပေါ်လာပါလိမ့်မယ်။ မပေါ်သေးရင် Menu က New account အောက်မှာ Email ကိုနှိပ်ပြီးဖွင့်လို့ရပါတယ်။
Your Name မှာ ကိုယ့်နာမည်ထည့်ပါ
Email address ထည့်ပါ
Password ထည့်ပါ။ Password မမှတ်မိတော့ရင် (သို့) Password ပြောင်းချင်တယ်ဆိုရင် Webmail မှာသွားပြောင်းလို့ရပါတယ်
Remember password ကိုအမှန်ခြစ်ပါ
ပြီးရင် Configure manually နှိပ်ပါ။ အောက်ပါအချက်အလက်တွေအတိုင်းထည့်သွင်းပါ
| Incoming Server | Value |
|---|---|
| Protocol | IMAP |
| Hostname | mail.example.com |
| Port | 993 |
| Connection security | SSL/TLS |
| Authentication method | Autodetect |
| Username | user@example.com |
| Outgoing Server | Value |
|---|---|
| Hostname | mail.example.com |
| Port | 465 |
| Connection security | SSL/TLS |
| Authentication method | Autodetect |
| Username | user@example.com |
Retest ခလုတ်ကိုနှိပ်ပါ။ The following settings were found by probing the given server လို့ပေါ်လာရင်ချိတ်ဆက်မှုအောင်မြင်ပါတယ်။
Done ခလုတ်ကိုနှိပ်ပါ။ အားလုံးမှန်ကန်လို့ ဆာဗာနဲ့ချိတ်ဆက်နိုင်ပြီဆိုရင် Account Successfully Created စာမျက်နှာကိုရောက်ပါမယ်။ Finish ခလုတ်ကိုနှိပ်ပါ။
New Message ခလုတ်ကိုနှိပ်ပြီး အီးမေးလ်ပို့လို့ရပါပြီ
Mac Mail
MacOS မှာအသင့်ပါလာတဲ့ Mail client အပလီကေးရှင်းဖြစ်ပါတယ်။ MacOS Mail မှာ အီးမေးလ်ထည့်ဖို့အတွက် System Settings ထဲက Internet Accounts ကိုသွားပါ။
Add Account ခလုတ်ကိုနှိပ်ပါ
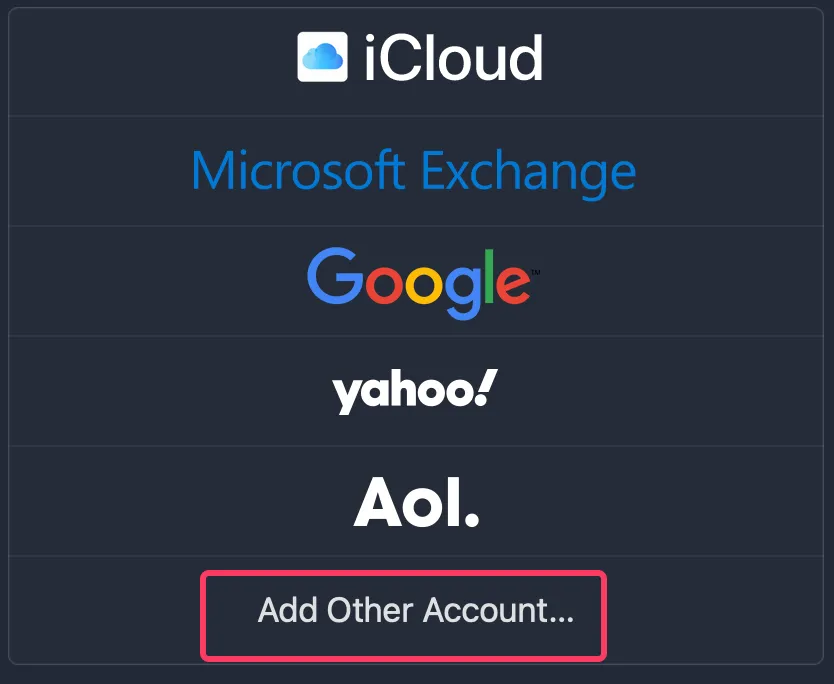
အောက်ဆုံးက Add Other Account… ကိုနှိပ်ပါ။ Mail account ကိုထပ်ရွေးပါ
Name မှာ မိမိနာမည်ထည့်ပါ
Email Adress ထည့်ပါ
Password ထည့်ပါ။ Password မမှတ်မိတော့ရင် (သို့) Password ပြောင်းချင်တယ်ဆိုရင် Webmail မှာသွားပြောင်းလို့ရပါတယ်
Sign In နှိပ်ပါ
Unable to verify account name or password လို့ error ပြရင်အောက်ပါအတိုင်း ဖြည့်ပေးပါ
| Email Address | user@example.com |
|---|---|
| User Name | user@example.com |
| Password | password |
| Account Type | IMAP |
| Incoming Mail Server | mail.example.com |
| Outgoing Mail Server | mail.example.com |
Select the apps you want to use with this account: မှာ Mail တစ်ခုပဲအမှန်ခြစ်ပါ။ Done နှိပ်ပါ
Mail အပလီကေးရှင်းကိုဖွင့်လိုက်ရင် အီးမေးလ်ဝင်ပြီးသားဖြစ်နေပါလိမ့်မယ်
Thunderbird for Linux
Linux အတွက် Thunderbird Download ရယူရန်။ Download စာမျက်နှာ Operating System မှာ Linux ကိုရွေးပါ။ Download ခလုတ်ကိုနှိပ်ပါ။ thunderbird-<version>.tar.bz2 နာမည်နဲ့ installer file ရပါမယ်။
Terminal ဖွင့်ပါ။ Downloads directory ကိုသွားပါ
cd ~/Downloadsls command နဲ့ ဖိုင်စစ်ကြည့်ပါ။ Download လုပ်ထားတဲ့ thunderbird-<version>.tar.bz2 ဖိုင်နာမည်ကို select လုပ်ပြီးကော်ပီယူပါ
tar xjf command နောက်မှာ ဖိုင်နာမည် paste လုပ်ပြီးဖိုင်ဖြည်ချပါ
tar xjf thunderbird-*.tar.bz2extract လုပ်ပြီးရင် rm command နဲ့ ဖိုင်ကိုဖျက်ပါ
rm thunderbird-*.tar.bz2ဖြည်လိုက်လို့ရလာတဲ့ thunderbird ဖိုဒါကို /opt folder ထဲကိုရွှေ့ပါ
sudo mv thunderbird /optPassword တောင်းရင်ထည့်ပေးပါ
Thunderbird executable ကို symlink ဆောက်ပေးပါ
sudo ln -s /opt/thunderbird/thunderbird /usr/local/bin/thunderbirdDesktop file ကို wget command နဲ့ ဒေါင်းလုပ်ဆွဲချပါ
wget https://raw.githubusercontent.com/mozilla/sumo-kb/main/installing-thunderbird-linux/thunderbird.desktop -P /usr/local/share/applicationsPermission denied ပြရင် sudo command ခံပေးပါ
အပလီကေးရှင်းထည့်တာ မှန်/မမှန်သေချာစေဖို့ Desktop က Thunderbird ကိုဖွင့်ပါ။ Thunderbird window ရဲ့ညာဘက်အပေါ်ဆုံးထောင့်က ≡ menu icon ကိုနှိပ်ပါ
Help ထဲက Troubleshooting Information ကိုသွားပါ
Application binary နေရာမှာ /opt/thunderbird/thunderbird-bin လို့ပြနေရင်မှန်ပါပြီ

Thunderbird ဖွင့်လိုက်တာနဲ့ Set up Your Existing Email Account ပေါ်လာပါလိမ့်မယ်။ မပေါ်သေးရင် Menu က New account အောက်မှာ Email ကိုနှိပ်ပြီးဖွင့်လို့ရပါတယ်။
Your Full Name မှာ ကိုယ့်နာမည်ထည့်ပါ
Email address ထည့်ပါ
Password ထည့်ပါ။ Password မမှတ်မိတော့ရင် (သို့) Password ပြောင်းချင်တယ်ဆိုရင် Webmail မှာသွားပြောင်းလို့ရပါတယ်
Remember password ကိုအမှန်ခြစ်ပါ
ပြီးရင် Configure manually နှိပ်ပါ။ အောက်ပါအချက်အလက်တွေအတိုင်းထည့်သွင်းပါ
| Incoming Server | Value |
|---|---|
| Protocol | IMAP |
| Hostname | mail.example.com |
| Port | 993 |
| Connection security | SSL/TLS |
| Authentication method | Autodetect |
| Username | user@example.com |
| Outgoing Server | Value |
|---|---|
| Hostname | mail.example.com |
| Port | 465 |
| Connection security | SSL/TLS |
| Authentication method | Autodetect |
| Username | user@example.com |
Retest ခလုတ်ကိုနှိပ်ပါ။ The following settings were found by probing the given server လို့ပေါ်လာရင်ချိတ်ဆက်မှုအောင်မြင်ပါတယ်။
Done ခလုတ်ကိုနှိပ်ပါ။ အားလုံးမှန်ကန်လို့ ဆာဗာနဲ့ချိတ်ဆက်နိုင်ပြီဆိုရင် Account Successfully Created စာမျက်နှာကိုရောက်ပါမယ်။ Finish ခလုတ်ကိုနှိပ်ပါ။
New Message ခလုတ်ကိုနှိပ်ပြီး အီးမေးလ်ပို့လို့ရပါပြီ
Thunderbird for Linux မှာ notification အဖွင့်အပိတ်ပြုလုပ်ရန်
Mobile Mail Clients
Gmail for iOS
Gmail app ကိုဖွင့်ပါ၊ ညာဘက်အပေါ်ထောင့်က မိမိ Profile icon ကိုနှိပ်ပါ
![]()
Add another account ကိုနှိပ်ပါ

Google ကိုရွေးပါ၊ Continue ဆက်နှိပ်ပါ
Email နှင့် Password ထည့်သွင်းပြီး Sign in လုပ်ပါ
Outlook for iOS
Microsoft Outlook အပလီကေးရှင်းကိုဖွင့်ပါ။ Add Account ခလုတ်ကိုနှိပ်ပါ။ ဖုန်းထဲမှာဝင်ထားဖူးတဲ့ Gmail account ၊ Microsoft account တွေရှိရင်ပြပေးနေပါလိမ့်မယ်။ ကိုယ်ဝင်ချင်တဲ့အီးမေးလ်မပါသေးဘူးဆိုရင် Skip နှိပ်ပါ
Email ထည့်သွင်းပါ
Email Provider မှာ IMAP ကိုအလိုအလျောက်ရွေးပေးပါလိမ့်မယ်။
IMAP ကိုရွေးရတဲ့အကြောင်းရင်းနဲ့ IMAP နဲ့ POP ကွာခြားချက်ကိုဖတ်ရန်
အောက်ပါအချက်အလက်တွေအတိုင်းထည့်သွင်းပါ
| Email Address | user@example.com |
|---|---|
| Display Name | Your name |
| IMAP Hostname | mail.example.com |
| IMAP Port | 993 |
| Port Security | SSL |
| IMAP Username | user@example.com |
| IMAP Password | password |
| SMTP Hostname | mail.example.com |
| SMTP Port | 465 |
| Port Secrity | SSL |
| SMTP Username | user@example.com |
| SMTP Password | password |
Sign in ခလုတ်ကိုနှိပ်ပါ။ Accept ထပ်နှိပ်ပါ။
အီးမေးလ်အသစ်ဝင်လို့ notification ရချင်ရင် Outlook would like to Send You Notifications ပေါ်လာတဲ့အခါ Allow နှိပ်ပါ။
iOS Mail
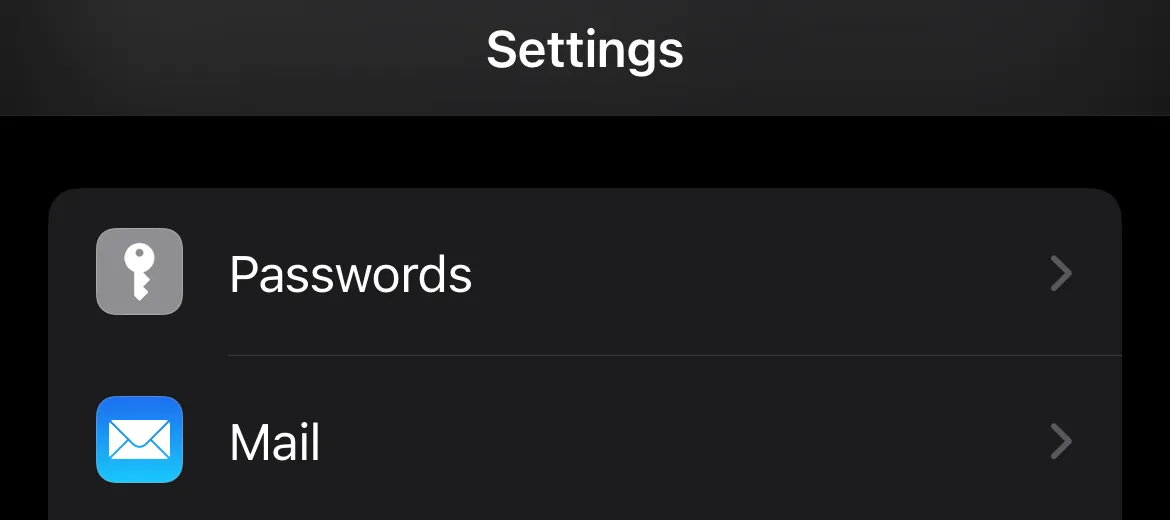
Settings ကိုသွားပါ
Mail ကိုသွားပါ
Accounts ထဲကိုသွားပါ
Add Account ကိုရွေးပါ
အောက်ဆုံးက Add Other Account… ကိုနှိပ်ပါ။ Add Mail account ကိုထပ်ရွေးပါ
Name မှာ မိမိနာမည်ထည့်ပါ
Email Adress ထည့်ပါ
Password ထည့်ပါ။ Password မမှတ်မိတော့ရင် (သို့) Password ပြောင်းချင်တယ်ဆိုရင် Webmail မှာသွားပြောင်းလို့ရပါတယ်
Next နှိပ်ပါ
နောက်စာမျက်နှာမှာ IMAP ရွေးပြီး အောက်ပါအတိုင်း ဖြည့်ပေးပါ
IMAP ကိုရွေးရတဲ့အကြောင်းရင်းနဲ့ IMAP နဲ့ POP ကွာခြားချက်ကိုဖတ်ရန်
| INCOMING MAIL SERVER | Value |
|---|---|
| Host Name | mail.example.com |
| User Name | user@example.com |
| Password | password |
| OUTGOING MAIL SERVER | Value |
|---|---|
| Host Name | mail.example.com |
| User Name | user@example.com |
| Password | password |
Verifying လို့ပြနေပြီး အမှန်ခြစ်ပြပြီဆိုရင် ချိတ်ဆက်တဲ့အပိုင်းအဆင်ပြေပါပြီ။ နောက်စာမျက်နှာ *Mail တစ်ခုပဲအမှန်ခြစ်ပါ။ Save နှိပ်ပါ
Mail အပလီကေးရှင်းကိုဖွင့်လိုက်ရင် အီးမေးလ်ဝင်ပြီးသားဖြစ်နေပါလိမ့်မယ်